What You Need to Know Prior to Performing Parighasana Asana?
Perform Parighasana asana with an empty stomach and a clean bowel. Your body will have sufficient time to digest your food if you eat four to six hours before your practise. Typically, 10 to 12 hours should elapse between meals and practice; hence, it is recommended to perform this asana in the early morning. However, due to their hectic schedules, several individuals do not exercise in the morning. These individuals can perform yoga in the evening.
Preparatory poses: Trikonasana, Utthita Parsvakonasana, Adho mukha svanasana, more
- Yogasana Level – Beginner
- Yogasana Style – Side bend
- Yogasana Repetitions – Alternately on Each Side
- Yogasana Strengthens – Glutes, pelvic floor, and obliques
- Yogasana Stretches – Spine, Hamstrings, and Sides of the Body
The influence of Parighasana Asana on the tri dosha
It affects both kapha and pitta dosha.
How To Do Parighasana Yoga Posture/Asana?
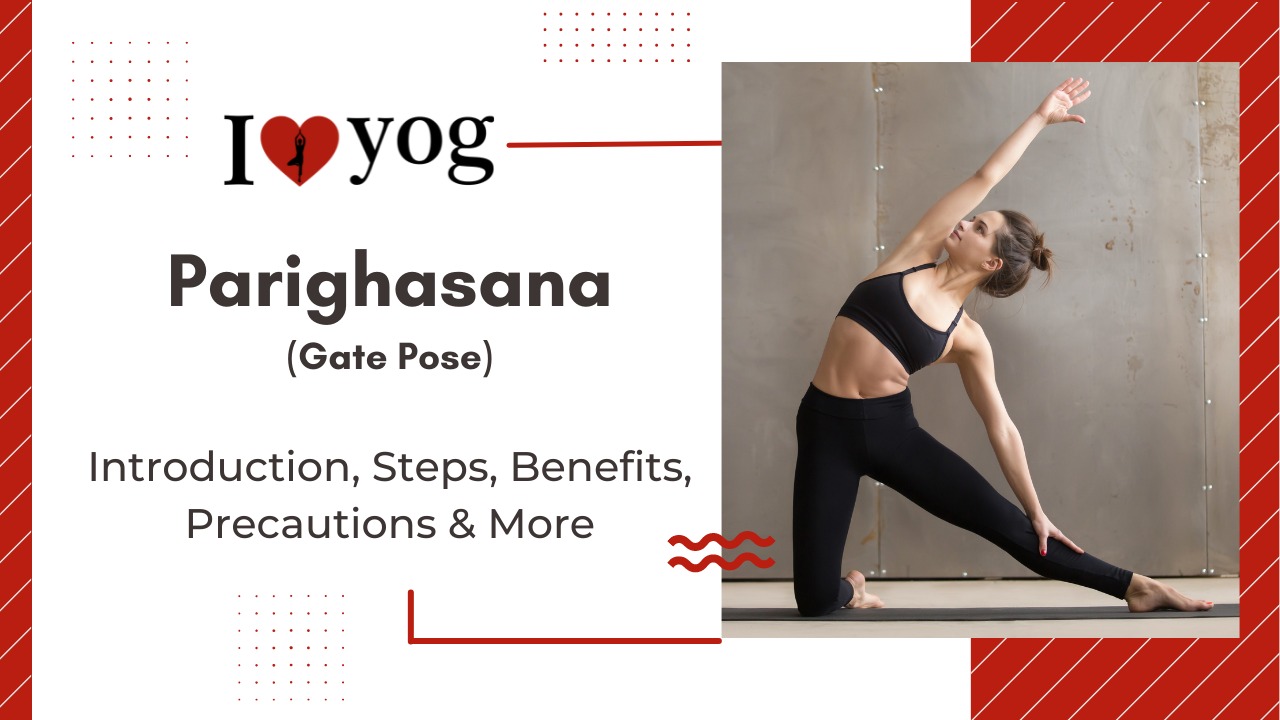
Start in a kneeling position with your knees and feet hip-width apart. Place the hands on the hips.
- Press down with all ten of your toenails. Maintain a neutral pelvic tilt, neither forward nor backward, while you extend your left leg in a straight line with your right knee.
- Deep in the left hip socket, externally spin and press the outer edge of the left foot and the big toe mound into the floor.
- Maintain your right hip directly over your right knee.
- Exhale and extend your right arm out to the side while twisting it externally so that the palm faces the ceiling.
- Exhale and lean toward your straight leg, allowing your left hand to comfortably slip down your left thigh. Avoid forcing the stretch.
- Turn your head to look beneath your raised right arm.
- Rotate your chest gently toward the ceiling. Avoid forward curvature of the spine by keeping the upper shoulder blade back.
- Utilize your inhalations to lengthen your spine and increase the intensity of the side body stretch.
- To release the pose, carefully stack your shoulders atop your hips, return to both knees, and rest your weight on your heels. Continue on the reverse side.
Benefits Of Parighasana Yoga Posture/Asana?
- Stretches, strengthens, and lengthens: This pose works on numerous portions of the body. It stretches the hamstrings, calves, and inner thigh on the outstretched leg. It stretches the psoas muscles (hip flexors), outer thighs (quadriceps), obliques, intercostal muscles, triceps, and latissimus dorsi on the side with the knee on the floor (the largest muscle of the back). The glutes, pelvic floor, and obliques are strengthened by this pose. It aids in the lengthening of the side body. It also stretches the IT band, making this a particularly advantageous stance for athletes, runners, and sportspeople.
- Flexibility and Range of Motion: Gate Pose is a hip opener because it aids in lateral hip flexor extension. Lateral stretches target the Quadratus Lumborum, a muscle that spans from the pelvic floor to the lowest rib. It is one of the key causes of lower back discomfort and is responsible for stabilizing the pelvis. Parighasana facilitates the release of lower back stiffness, which in turn increases the range of motion of the spinal muscles.
- Chest, Diaphragm, and Breathing: Stiffness in the intercostal muscles can cause shorter, shallower breaths because the lungs are unable to fully expand. As the intercostal muscles of the side that is extended are stretched, the lungs are able to expand to their maximum capacity when breathing. This enables the practitioner to take deeper breaths even when not executing the asana.
- Alignment and Posture: For the best form of the Gate Pose, alignment is crucial. Students should be instructed to avoid flexion of the hips, which will cause the pelvis to shift backwards and increase pressure on the lower back. To avoid this, keep the pelvis engaged and square (push them forward). Students can be introduced to this position with the support of the wall by placing the balls of their feet on the wall in order to better comprehend this alignment. This helps engage the deeper pelvic muscles (and strengthen the glutes). This slight alteration in alignment allows the hips to open even more, and can therefore be incorporated into yoga courses for persons who spend a great deal of time sitting (in the workplace or when travelling), as well as teen yoga students.
- Stimulations and Organs: By stretching and tightening the deeper muscles, the lateral bend stimulates the internal organs. The stomach, small intestine, and pancreas are located on the left, whereas the gallbladder, liver, and large intestine are located on the right. As one performs a lateral stretch, one side of the abdomen is compressed, decreasing blood flow to the region. This causes a’squeeze and release’ motion on the organs, which enhances their performance once blood circulation restarts. The organs on the extended side are stretched, which helps to alleviate organ stagnation.
- Therapy and Healing: Parighasana increases the body’s immunity in multiple ways. First, as the chest can now expand more than before, the functioning of the respiratory system is enhanced. This reduces the frequency and severity of allergic reactions over time. Moving the arm overhead activates the lymphatic system, as the armpit contains lymph nodes, which are essential to the body’s immune system. This promotes lymphatic flow, which carries antibodies, within the body. Consequently, for people with antibodies. Therefore, this practice can be incorporated into therapy yoga for individuals who require it, along with the necessary props to help students hold the pose longer. With the lateral stretch, this position also helps to improve digestion, particularly for people with IBD-related illnesses, and can also alleviate back pain.
- Chakra and Balancing: A beautiful technique that is a mild heart opening, thereby activating the Anahata Chakra (Heart Chakra), while maintaining balance in the first two chakras (Root and Sacral). The side bend energises the body by increasing the flow of prana from the heart to the Third Eye Chakra. And at the point of releasing from the stance, there is a downward flow of energy – apana vayu (removing the excess out), so assuring a balance in energy and, ultimately, in the first four chakras.
- Preparatory Pose: Gate Pose can be a preliminary pose for deeper lateral twists such as Parivritta Janu Sirsasana and Sage Visvamitrasana at a more advanced level, when students can hold the pose for longer.
What Are the Contraindications and Precautions for Parighasana/Asana?
Students must be properly guided into and out of Gate Pose (Parighasana) as it is a tough beginner-level practice. Additionally, there are additional precautions to consider, which are discussed below:
Following are the precautions to take during various types of injuries:
- Knee Injury: For mild knee injuries (or rehabilitation), a blanket or rolled-up mat can be placed beneath the knees. In the event of severe knee injury, this pose can be performed on a chair, as in Gate Pose on a Chair.
- Ankle or rib cage injuries: It necessitates avoiding the posture until the injury has fully healed. This is due to the fact that Gate Pose encourages the rib cage to open, which may exacerbate symptoms or pain. This pose should be avoided by students with ankle injuries because it needs the ankle of the extended leg to bear weight and maintain balance. This may place excessive stress on the damaged joint.
- Shoulder injury: Students with shoulder joint or arm injuries can practise this pose by placing their hand on their hip (instead of taking the arm overhead).
- Wear and Tear: Students recuperating from any type of wear and damage in the deeper tissues, including at the calves, hamstrings, gluteus, rotator cuff tear, etc., should avoid practising Gate Pose.
- Heart Conditions/Surgeries: Because Gate Pose stretches the diaphragm and heart muscles, it may pose difficult for those who have recently undergone heart surgery or been equipped with a pacemaker. In such circumstances, this position should be avoided at all costs.
- Hernia: Individuals suffering from or recovering from hernia troubles and/or surgery should not practise this pose as it stretches the abdominal walls and muscles. This could have a negative effect on recovery.
- Pregnancy: Women in their third trimester of pregnancy should not perform this posture, as it may place strain on their uterus, ribs, and lower back.
What Is the Science Behind Parighasana/Asana?
It allows you to gently push your balance with your knee and foot on the ground, while your upper body and ribcage gain additional room. The intercostal muscles, which become weak from bad posture, are targeted by the posture.
Tips For Beginners On The Parighasana Posture/Asana?
Beginners’ tips
- Use a wall to increase the stability of your stretched leg. Place your foot’s ball against the wall.
- An option to lay your hand on your leg is to use a block.
- Avoid these blunders to get the most out of this pose and reduce strain.
Heavy Hand
Avoid placing excessive weight on the hand that is lying on your leg. Maintain a soft touch so that your core remains active and no pressure is placed on the knee.
Chest or Shoulder Sagging
You should have an open chest and a torso that is parallel to your thigh. Do not drop your shoulders or chest forward.
Advanced Changes in Pose
Adjustments and Variations
As with most yoga postures, this pose can be performed in a variety of ways, depending on your needs and level of practice.
Need an Alteration?
If you are unable to press your extended foot into the floor, consider placing a folded blanket beneath the ball of your foot or positioning yourself next to a wall and forcing your foot against the wall.
You can perform a variant while seated on a chair if you cannot kneel. You can position your legs in front of you or extend one to the side, as shown in the posture.
Willing to Accept a Challenge?
Instead of bringing your right foot parallel, keep it in line with your right leg and, if feasible, bring the ball of your foot to the ground.
Related Yoga Poses/Asanas –
- Counter Pose
- Balasana (Child’s Pose)
Reference:


